Before doing the wallpaper, I wired the master bedroom for 3 LED ceiling lights. I have been working on fixture designs but I will write about that later when I am done making them. I ran the wires from the living room (where the lighting equipment will be behind a false wall) to the ceiling of the master bedroom. You can just see the two wires up the back wall in the picture below. The wires are very small and I felt sure that they wouldn't be visible behind the paper.
Next I made templates of the master bedroom walls out of pieces of magazine pages. Shown below are 1 of the side walls and the back wall. These I used to cut out the wall paper for the walls.
Below is the cut out wallpaper for one of the side walls. I put it into the house to dry-fit check it. I had to trim it a small amount to make it fit but the templates worked pretty well. There is about 1/4" extra on the end that will fold around the corner onto the back wall. This is because if you end the paper at the corners it ends up leaving a gap according to some other dollhouse decorating blogs.
Next I dry fit all the wallpaper in the room and it looks like the fit is good! One issue I ran into is that the back wall paper is a slightly different shade and scale compared to the side walls, however, it isn't too noticeable unless you realy look for it.
Next I mixed up some adhesive using the powder shown below. It was the only wallpaper adhesive that the hardware store had. I didn't want to use a more permenant glue just in case someone wants to re-decorate some time in the future.
The glue ended up looking like semi-transparent grits. I was a little skeptical about its sticking power so I tested it on a scrap pasted to a cardboard box. It does look pretty good.
I painted paste on the fold-over flaps and then painted paste on the walls, 1 wall at a time. When it was still wet, the wires were really visible. I think I made it worse trying to make them less visible, but now that its dry its not as bad as I was expecting. I can still see the wires on the back wall though, so next time I will definitely hide the wires better, along the corners. One of the side walls had a major wrinkle in it but Kristian saved the day by un-sticking half of the paper so I could re-stick it without wrinkles. I cut the window and door out after the paper was dry. It looks pretty nice in day-light!
After the stress of doing the master bedroom wallpaper, I wanted to relax and do a fun project to relax. I have been wanting to do this for a while. First i cut out some walls from basswood sheets. These are to scale and match the dollhouse walls
 |
| One of the dollhouse sides and the middle floor, you can see the "planks" i carved into the floor |
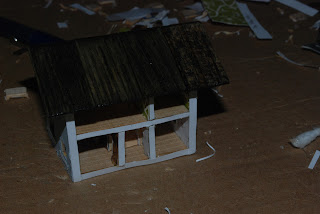
Then I glued them all together. The floor plan actually matches the full sized dollhouse. The staircase is just a plank with steps marked into it. Below is the structure minus the wall separating the dining room from the hallway.
I painted the outside with the same paint I used on the outside of the full-sized dollhouse and made a roof out of left over shingles. I also put white wallpaper over the edges to make it look a little nicer.
Here are some more pictures of the finished product.
Just for comparison...
 |
| Miniature dollhouse |
 |
| Full-sized dollhouse |
I think this will look cute in the nursery when it is done :)


No comments:
Post a Comment